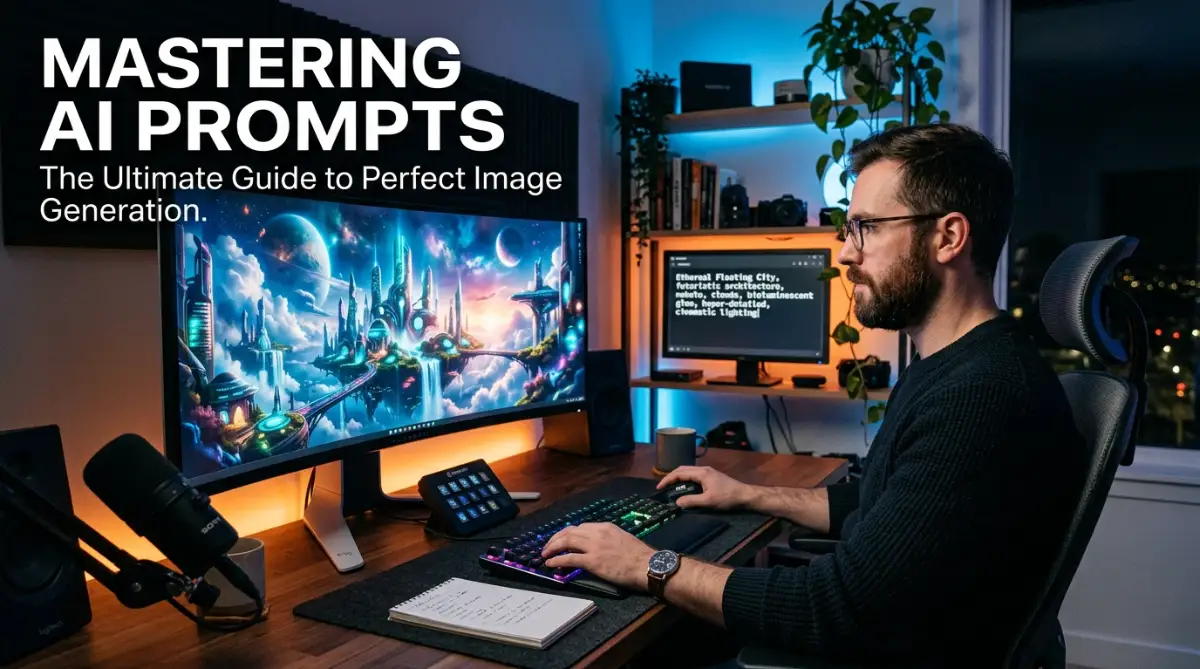
My Long Road to Making AI Finally Understand My Brain
I remember sitting at my desk three months ago, staring at my computer screen with a huge headache. I had just spent four hours trying to get an AI tool to draw a simple picture of a brave knight standing on a mountain. Every time I hit "generate," the result was a total disaster. One time the knight had three legs, and the next time the mountain looked like a giant piece of melting cheese.
I felt so stupid and annoyed because I knew these tools were powerful. I saw other people online making beautiful, breathtaking art that looked like it belonged in a movie. But for me, it felt like I was speaking a language the computer just didn't understand. I almost gave up and went back to buying expensive stock photos.
It felt like I was throwing words at a wall and hoping something would stick. My creative flow was completely dead, and I was losing time I didn't have. If you have ever felt this way, I want you to know that you are not alone in this struggle.
Many people feel a deep sense of failure when they first use AI image tools. We see the amazing ads and we think it will be as easy as magic. When the tool gives us something ugly or weird, we start to doubt our own creativity. It's not just about a bad picture; it's about the time we lose and the frustration of not being able to show what is in our heads.
This mental stress is real because we want to be productive. We want to create things for our blogs, our social media, or our businesses. When the AI fails, it feels like a wall is standing between our ideas and the world. It can make you feel like you are "behind" everyone else who seems to be an expert.
I realized that the problem wasn't the AI, and it wasn't my brain either. The problem was the bridge between us. I was talking to the AI like it was a human friend, but it’s actually more like a very talented but very literal artist. Once I figured out how to build that bridge with specific words, everything changed for me.
Why Talking to AI is Different Than Talking to People
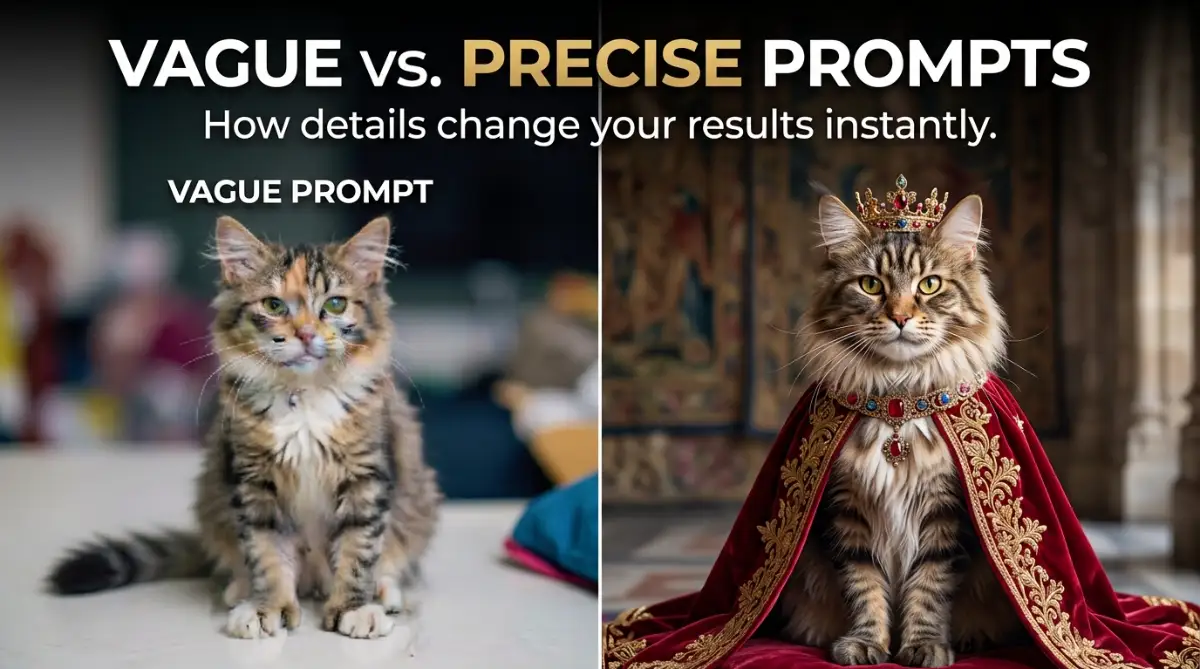
The biggest mistake I made at the start was being too vague. I would type things like "a beautiful sunset" and expect a masterpiece. The AI has seen billions of sunsets, so it just picks a random one. To get what you want, you have to be the boss of the details.
Think of an image generator like a very fast painter who has no imagination of their own. They have the skill to paint anything, but they need you to tell them where the light comes from. They need to know what kind of camera lens you are using and what the colors should feel like.
Science shows us that these models work on patterns. If you don't give them a clear pattern, they fill in the gaps with whatever is easiest. This is why so many AI images look "generic" or "fake" when you first start out. We need to give the machine a map, not just a destination.
The Secret Formula for Perfect Prompts
I found a simple way to look at this that helped me stop wasting my credits. I call it the "Subject, Action, Context" rule. Instead of just naming a thing, you describe a whole scene in a specific order. This helps the AI process your request without getting confused by too many random words.
First, you name your main subject very clearly. If it's a person, tell the AI what they are wearing and what their expression looks like. If it's an object, describe the material it is made of. The more "solid" you make the subject in your words, the better the AI can "see" it.
Next, you add the action. What is happening in the scene? Is the wind blowing? Is someone laughing? Action adds movement and life to the image. Without action, images often look stiff and robotic, which is something we definitely want to avoid.
Setting the Scene with Lighting and Mood
Lighting is probably the most powerful tool in your prompt writing kit. If you don't mention light, the AI usually gives you a flat, boring look. I started using words like "golden hour," "soft studio lighting," or "cinematic shadows." These words tell the AI exactly how to shade the image.
When you change the light, you change the whole feeling of the art. A forest in the morning light looks happy, but a forest with "harsh moonlight" looks scary. By choosing your light words carefully, you control the emotions of the person looking at your picture.
Pro Tip: I used to think adding fifty adjectives would make the image better, but I was wrong. I found that using three very strong, specific words works much better than ten weak ones. If you say "glowing, bright, shining, luminous," the AI gets overwhelmed. Just pick "luminous" and move on to the next detail!
Choosing the Right Art Style
You also have to tell the AI what "medium" to use. Do you want a photo? Do you want an oil painting? Maybe you want a 3D render like a Pixar movie. If you don't say anything, the AI might give you a weird mix that looks like a cheap drawing.
I like to use terms like "photorealistic" or "shot on 35mm film" for my blog images. This gives them a professional look that people trust. If I want something more creative, I might mention a specific art style like "minimalist vector art." This keeps the style consistent across my whole website.
Watch this visual guide to see how different prompt structures change the final image in real-time.
The Power of Descriptive Adjectives
Using the right adjectives is like adding salt to a meal. Too little and it's bland; too much and it's ruined. You want to find that perfect balance. Instead of saying "a big house," try saying "a sprawling Victorian mansion." The second version gives the AI a lot more to work with.
I've learned that "vibe" words are very helpful too. Words like "nostalgic," "futuristic," or "gritty" help the AI choose a color palette. If you say "futuristic," it will probably use blues and neons. If you say "nostalgic," it might use warmer, faded colors.
This is a very logical way to work. You are basically coding with human language. Each word you add is a line of instruction for the computer. When you see it this way, prompt writing becomes a fun puzzle instead of a frustrating chore.
Avoiding the "Uncanny Valley" in AI Images
One of the biggest problems we face is when people in AI images look "creepy" or not quite human. This is often called the uncanny valley. To avoid this, I started being very specific about skin texture and eyes. I add words like "natural skin pores" or "detailed eyes" to my prompts.
This tells the AI not to smooth everything out like plastic. Real people have imperfections. By asking for those imperfections, you actually make the image look more professional and less like a "fake" AI creation. It sounds strange, but "perfect" is often the enemy of "good" in the world of AI.
We also have to be careful with hands and feet. AI still struggles with these parts. I usually try to describe the person’s pose in a way that keeps their hands simple. For example, "hands tucked in pockets" or "holding a coffee cup." This is a smart trick to avoid those weird six-finger mistakes!
Why Context and Background Matter So Much
A lot of people forget about the background. They focus so much on the person or the object that the background ends up looking like a messy blur. I started treating the background as a second subject. If my character is in a library, I describe the "dust motes dancing in the light between old wooden shelves."
This level of detail makes the image feel like a real place. It draws the reader in and makes your blog post feel much higher quality. A good background provides "weight" to the image. It makes the main subject feel like it truly belongs in that world.
I also suggest using "depth of field" as a keyword. If you want the background to be blurry so the subject stands out, say "shallow depth of field." If you want everything to be sharp, say "wide angle shot." This gives you the power of a professional photographer without ever touching a camera.
Organizing Your Prompt Structure for Success
After a lot of trial and error, I found a structure that works every single time. I always put the most important things first. The AI pays more attention to the words at the beginning of the prompt than the ones at the end. If the "subject" is the most important part, it goes first.
If the "style" is the most important part, I put that first. For example, "An oil painting of a lonely lighthouse" will look different than "A lonely lighthouse in the style of an oil painting." The AI prioritizes your first few words, so choose them wisely!
I keep a small notebook—well, a digital one—where I save my best prompts. When I find a "recipe" that works, I keep it. This saves me so much time later. Instead of starting from scratch, I just swap out the subject and keep the lighting and style words the same.
Using Negative Prompts to Clean Your Images
If you are using tools like Midjourney or Stable Diffusion, negative prompts are your best friend. These are things you tell the AI not to include. I often use negative prompts for things like "blurry," "extra limbs," "distorted faces," or "low resolution."
It's like telling the artist, "I want a cake, but please don't use any nuts because I'm allergic." It narrows down the possibilities and helps the AI focus on the good stuff. Even simple negative prompts can increase the quality of your images by 50% or more.
I started doing this after I got frustrated with too many "cartoonish" results when I wanted photos. Now, I just put "drawing, cartoon, illustration" in the negative section. This forces the AI to stay in the world of photography. It's a simple step that makes a massive difference in your final result.
The Importance of Camera Angles
Did you know you can tell the AI exactly where to put the "camera"? This was a game-changer for me. Using words like "low angle shot" makes a subject look powerful and tall. Using a "bird's eye view" makes a scene look vast and organized.
If you don't specify the angle, the AI usually goes for a boring, eye-level shot. By changing the perspective, you make your images more dynamic. It feels more like a movie scene and less like a static photo. This keeps your blog readers interested and makes your content stand out from the crowd.
I often experiment with "macro photography" for close-up shots of objects. This creates a very professional, high-end look for product-style images. It shows the AI that you are in control and you know exactly what kind of visual story you want to tell.
Understanding Aspect Ratios for Different Platforms
One thing I learned the hard way is that the shape of the image matters just as much as the content. If you are making a featured image for a blog, you want a wide rectangle. If you are making something for a phone screen, you want a tall rectangle.
Most AI tools default to a square. Square images are okay, but they often look a bit "basic." I always add the aspect ratio command at the end of my prompts. For a blog, I use something like "--ar 16:9." This ensures the composition of the image is perfect for the space it will fill.
When the AI knows the shape of the canvas, it places the subjects more intelligently. It won't try to cram a wide landscape into a narrow box. This is a very practical step that prevents your images from looking cut off or strangely framed.
Keeping Your Tone Consistent Across a Project
If you are writing a long guide or a book, you want all the images to feel like they belong together. This is where "brand" keywords come in. I pick a specific set of 3-4 style words and I use them in every single prompt for that project.
For example, I might use "soft pastels, ethereal, clean lines" for a lifestyle blog. Every image I generate will then have that same "feel." This makes your website look professional and well-planned. It builds trust with your audience because they can see that you care about the details.
It's much better than having one photo that looks like a movie and another that looks like a comic book. Consistency is the key to great design. AI makes it easy to be consistent, but only if you are strategic with the words you choose to repeat.
Taking Your AI Art to the Next Level: Professional Secrets
I used to think that writing a prompt was like ordering a pizza. I thought I could just say what I wanted, hit a button, and wait for it to arrive. But after months of testing, I found out that it is more like being a movie director. You are not just asking for an image; you are building a whole world.
One of the best tricks I found is called iterative prompting. This means you don't try to get the perfect picture on your first try. Instead, you start with a very simple base and add one detail at a time. I start with the subject, see what the AI makes, and then add the lighting.
This way, I can see exactly which word changes the image. If I add "neon lights" and the image gets too messy, I know that specific word is the problem. It saves me so much time because I am not guessing anymore. If you want to understand more about how these machines think, you should check out this guide on how generative AI works and its neural architecture.
Playing with Word Weights and Power
Some tools let you tell the AI which words are more important than others. I found this to be a total game-changer for my creative work. In Midjourney, for example, you can use double colons to give a word more "weight." If I want a forest but I want the flowers to be the main focus, I write "flowers::2" and "forest::1."
This tells the AI to spend twice as much "brain power" on the flowers. It prevents the background from taking over the whole scene. This is a very logical way to balance your art. You can find many high-quality research papers on image synthesis that explain why these weights matter for the computer.
I also learned that the order of words is like a ranking system. The first three words are the "kings" of your prompt. If you put "cinematic lighting" at the very end, the AI might ignore it. I always put my most important style words right at the beginning to make sure they shine.
Using Camera Gear Terms for Realistic Photos
If you want your AI images to look like real life, you have to talk like a photographer. I stopped using the word "realistic" because it's too broad. Instead, I started using terms like "85mm lens" or "f/1.8 aperture."
These words tell the AI exactly how much blur to put in the background. An 85mm lens is great for portraits because it makes the person look sharp and the background soft. When I started doing this, my friends thought I had hired a professional photographer for my blog!
I also use terms like "shutter speed" to control movement. If I want a waterfall to look smooth and silky, I type "long exposure." If I want to see every single drop of water, I type "high shutter speed." It’s amazing how much control you have when you use the right vocabulary.
The Magic of Color Theory
Color is not just about making things look pretty; it's about telling a story. I used to just let the AI pick the colors, but now I take charge. I use terms like "complimentary colors" or "monochromatic blue palette."
This keeps the image from looking like a rainbow exploded on the screen. It makes the art feel calm, exciting, or sad, depending on my choice. I often look at professional design sites like Adobe Color to find good color sets before I even start typing.
For my blog at Study Guide Nes, I try to keep the colors consistent. I want my readers to feel a certain mood when they see my images. By picking a "warm golden" or "cool slate" tone, I make sure all my posts look like they belong to the same family.
The Scary Traps That Can Ruin Your Progress
I see so many people getting frustrated with AI because they fall into the same traps I did. The biggest mistake is over-prompting. This happens when you put too many ideas into one single box. The AI gets confused and starts mixing things together in a way that looks like a nightmare.
Imagine trying to tell a painter to paint a cat, but also a spaceship, and a birthday cake, and a snowstorm, all at once. The painter will probably give up or make a mess. AI is the same way. When you add too many details, the quality of the image drops fast. You lose that "crisp" look and everything starts to look like blurry plastic.
I felt so much pain when I spent a whole afternoon writing a 200-word prompt, only to get an image that looked like garbage. It made me feel like I was failing at technology. But I realized that simplicity is actually the secret to power. You don't need a wall of text; you need a few perfect words.
Ignoring the Power of Negative Space
Another big mistake is not giving the subject "room to breathe." If you don't describe the space around the object, the AI often crowds the frame. This makes the image feel tight and uncomfortable to look at. It can actually make your website visitors feel stressed without them even knowing why!
I always try to include words like "minimalist background" or "centered composition." This gives the image a professional, clean feeling. It’s like a clean room versus a messy room. A clean image helps your reader focus on your message instead of getting distracted by random AI clutter in the corners.
Forgetting to Check for Human Errors
We often trust the AI too much. We hit "download" and post the image immediately. This is a huge mistake! You should always look at the small details, especially eyes and fingers. I once posted an image where a woman had seven fingers, and I didn't notice until a reader pointed it out.
It was so embarrassing! It made my whole blog look unprofessional. Now, I always take a deep breath and look at the image for at least thirty seconds before I use it. I look for "floating objects" or weird shadows that don't make sense. Being careful saves your reputation as a creator.
Your New Daily Routine for AI Success
You don't need to be a computer scientist to be great at this. You just need a solid plan. I suggest starting your day by trying one new "keyword" every morning. Maybe today you try "Baroque lighting" and tomorrow you try "Cyberpunk aesthetic."
This slow and steady learning helps you build a "mental library" of styles. Over time, you will know exactly what to type without even thinking about it. It’s like learning to drive a car. At first, you have to think about every move, but soon it becomes part of you.
I want you to feel the excitement of seeing a perfect image pop up on your screen. That moment when the AI finally "gets it" is one of the best feelings in the world. It’s like you and the machine are finally speaking the same language. It opens up a whole new world of creativity that was locked away before.
My biggest piece of advice is to stay curious. Don't be afraid to break the rules and see what happens. Some of my best images came from "accidents" where I used a word in a weird way. Use your imagination and let the AI do the heavy lifting for you!
I truly believe that anyone can master this tool if they just take it one step at a time. I used to be terrible at this, but now I create art that I am truly proud to show the world. I want you to have that same confidence every time you open your AI tool. You have the ideas in your head, and now you have the map to bring them to life!
Answers to the Most Common Prompting Worries
Why do my AI images always look so blurry?
This usually happens because your prompt is too vague or you are missing "quality" keywords. Try adding terms like "high resolution," "sharp focus," or "detailed textures" to help the AI understand you want a clear picture. Also, make sure you are not using too many conflicting adjectives that confuse the machine.
Is it better to use long sentences or short keywords?
Most AI tools prefer a mix of both, but starting with a clear sentence is usually best. I like to start with "A photo of..." and then add comma-separated keywords for the details. This gives the AI a clear subject while providing extra bits of information to fill in the gaps.
How do I stop the AI from making people look creepy?
Focus on describing the skin and lighting more naturally. Use words like "soft sunlight," "natural skin texture," and "detailed eyes." Avoiding the word "perfect" can actually help, as it prevents the AI from making things look like unnatural plastic or wax.
Can I use the same prompt for different AI tools?
You can, but the results will be very different. Each tool, like Midjourney or DALL-E, has its own "personality" and way of reading words. It is better to tweak your prompt slightly for each tool to get the best out of their specific strengths.
Disclaimer: This guide is for educational purposes only. AI image generation technology is changing very fast, and results may vary based on the specific tool or version you are using. Always check the terms of service for any AI tool you use for your blog or business.